

A final walkthrough is a practical safeguard, not a substitute for a home inspection. In British Columbia, your right to a walkthrough before completion depends on the terms of your purchase contract, so arrange it as part of the transaction. Knowing how to prepare for a final walkthrough before closing means scheduling it close to completion and checking the home’s condition, agreed repairs, and included items.
It’s natural to want reassurance before taking possession. This guide explains what to test, from lights and outlets to plumbing, appliances, and heating, and what to do if you find a problem. You’ll also learn when to schedule the walkthrough and how to keep the visit focused, so you can raise concerns while there’s still time to address them before completion.
Key Takeaways
- Use the walkthrough to compare the home’s condition and included items with the purchase agreement, including promised outdoor work.
- Test key systems and fixtures, from lights and outlets to plumbing, appliances, fans, and heating or cooling.
- Arrange the visit close to completion so you can spot changes and raise concerns before the transaction is finalized.
- Record any issues clearly and communicate them promptly through the appropriate transaction channels.
1. What do buyers look for during the final walkthrough?
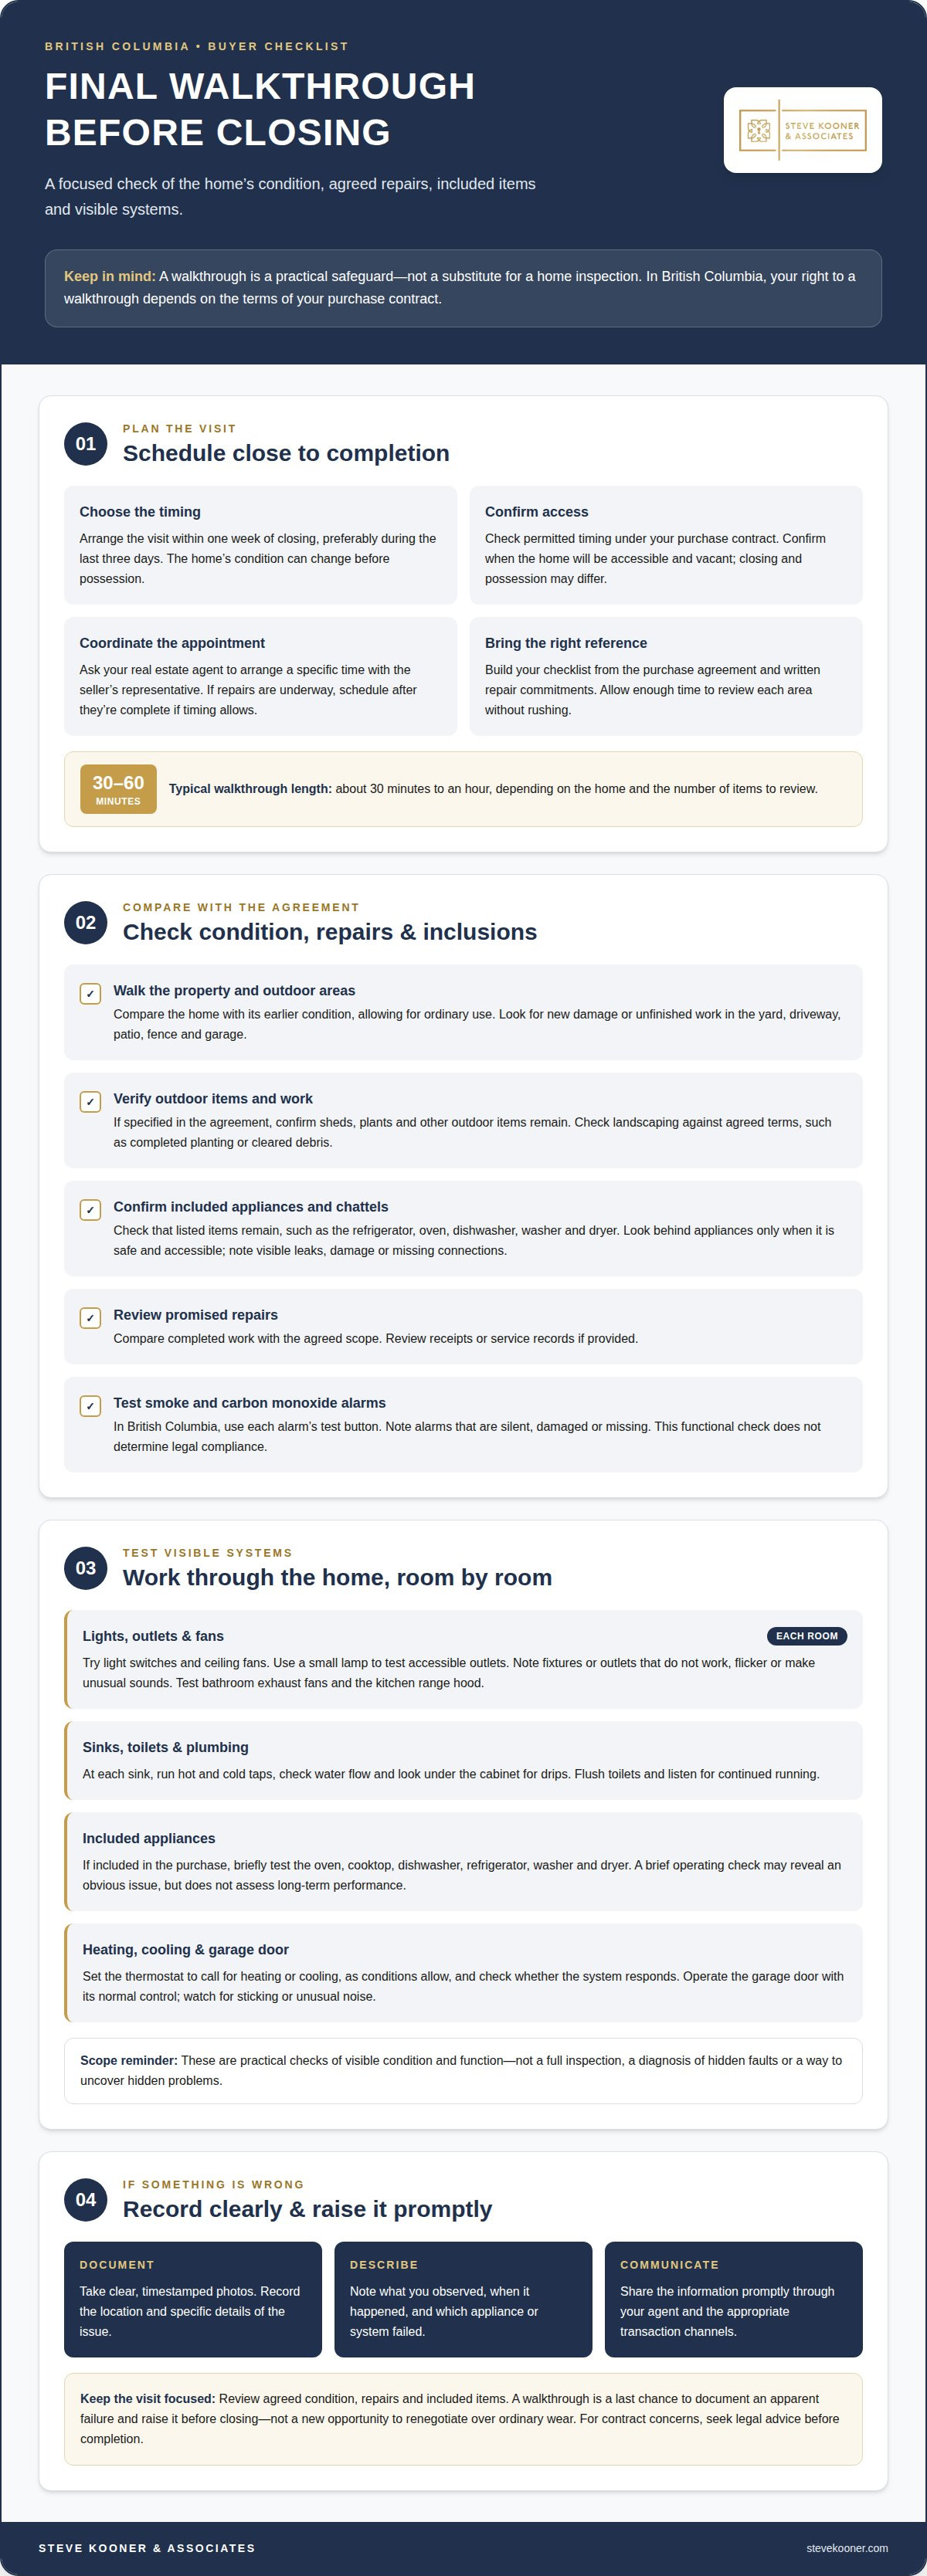
Use the purchase agreement as your checklist during this real estate visit, rather than relying on memory. Compare the property’s condition with what you saw earlier, allowing for ordinary use. Walk around the yard, driveway, patio, fence, and garage, looking for new damage or unfinished work. If the agreement says a shed, plants, or other outdoor items are included, confirm they’re still there. Check that landscaping matches the agreed terms, such as completed planting or cleared debris.
Next, review the agreement’s inclusions and any written repair commitments. Confirm that included appliances and chattels remain, such as the refrigerator, oven, dishwasher, washer, and dryer, if specified. Look behind appliances only if it’s safe and accessible, and check for visible leaks, damage, or missing connections. Compare completed repairs with the agreed scope, and review receipts or service records if provided. A walkthrough checks visible condition and included items; it doesn’t replace a home inspection or reveal hidden problems. For buyers managing custom construction or specialized builds, boutique real estate and building teams like Galloway Realty emphasize that tracking contracted specifications closely during this stage ensures punch-list items are resolved before handover.
In British Columbia, check that smoke and carbon monoxide alarms present in the home respond when tested. Use each alarm’s test button and note any that are silent, damaged, or missing. This is a functional check, not a determination of legal compliance. A final walkthrough usually takes about 30 minutes to an hour, depending on the home and the number of items to review. If you find a discrepancy, take clear photos, record its location, and raise it promptly; seek legal advice about contract concerns before completion.
2. Testing lights, outlets, fans, plumbing, appliances, and HVAC
Test the light switches and ceiling fans in each room, then use a small lamp to check accessible outlets. Note any outlets or fixtures that don’t work, flicker, or make unusual sounds. The goal is to check that visible systems function, not to repeat a full inspection or diagnose hidden faults. Record specific problems, such as a bedroom outlet that won’t power a lamp or a bathroom fan that won’t start.
At each sink, turn on the hot and cold taps, check the water flow, and look under the cabinet for drips. Flush the toilets and listen for continued running. Test the oven, cooktop, dishwasher, refrigerator, washer, and dryer if they’re included in the purchase. A brief operating check can reveal an obvious issue, but it won’t assess long-term performance. Open and close the garage door with its normal control, watching for sticking or unusual noise.
Set the thermostat to call for heating or cooling, as conditions allow, and check whether the system responds. Test the bathroom exhaust fan and kitchen range hood, too. These practical checks can help identify surprises before the transaction is complete. The final walkthrough is a last chance to document an apparent failure and raise it before closing, not a new opportunity to renegotiate over ordinary wear. Record which appliance or system failed, what you observed, and when. Clear details help the parties discuss the issue without confusing it with an earlier inspection finding.
3. Scheduling the final walkthrough close to closing
Knowing how to prepare for a final walkthrough before closing starts with choosing a date close to completion. Arrange the visit within one week of closing, preferably during the last three days. This gives you a chance to see the home after the sellers move out and notice changes, unfinished repairs, or debris. An earlier visit may help, but the property’s condition can change before possession. Confirm access and permitted timing under your purchase contract before booking.
Closing and possession don’t always happen at the same time, so confirm when the home will be accessible and vacant. If you find a problem, take timestamped photos and note its location and details. Promptly share this information through your agent and seek legal advice about any contract or closing implications. Raising concerns before completion gives the parties a chance to discuss next steps. Keep the visit focused on the agreed condition, repairs, and items included in the purchase.
Discuss your purchase offer
Steve Kooner & Associates
Steve Kooner & Associates supports buyers through the real estate transaction, from offer review and negotiation to contract and transaction management. If you’re preparing for a final walkthrough, the team can help you understand how your purchase terms, agreed repairs, and included items relate to the next steps in your purchase. This guidance can be useful when you’re buying a detached home, townhome, condominium, presale, or new construction property in the Fraser Valley. If the walkthrough reveals a concern, the team can help you navigate the transaction and communicate your questions through the appropriate channels. For legal advice about contract rights or closing, consult your lawyer. For practical guidance on your purchase, contact Steve Kooner & Associates.
Move Into Your Purchase With Confidence
Knowing how to prepare for a final walkthrough before closing is one part of making a thoughtful home purchase. Keep your questions, purchase terms, and closing plans aligned as the transaction progresses. Clear communication can help you address concerns with the right people before completion.
Steve Kooner & Associates supports buyers with presale home purchases, new construction purchases, and detached single-family home purchases. The team can help you navigate your real estate decisions and transaction with practical guidance tailored to your purchase.
With careful preparation and support, you can approach your next move with greater clarity and confidence.
Frequently Asked Questions
Is a final walkthrough legally required?
In British Columbia, don’t assume a final walkthrough is automatically included as a legal right. Whether you can access the home before completion depends on the purchase contract and arrangements made by the parties. Review the relevant terms with your real estate representative. If the wording affects your legal rights, ask your lawyer to explain it before completion.
What’s the final house walkthrough in a real estate transaction?
A final walkthrough is a pre-completion visit to see the property before ownership changes hands. It helps you assess whether the home and agreed items appear consistent with your contract. It isn’t a substitute for a professional inspection, which assesses a home more broadly. For example, a walkthrough may reveal a missing appliance, but it can’t establish the condition of hidden wiring.
Can I delay closing if I find a problem?
Possibly, but finding a problem doesn’t automatically change the completion date. Depending on the contract and circumstances, the parties may discuss a solution such as a repair, credit, holdback, or amended closing arrangement. Document what you found and promptly tell your real estate representative and lawyer. Don’t assume you can delay completion without agreement or legal advice.
How does a seller avoid problems from cropping up during the final walkthrough?
Plan the move so the home is ready for the agreed handover, and keep a written record of completed repair work. Before the buyer’s visit, avoid removing items listed as included or making changes that could affect the property. A clear record of the home’s condition and repair arrangements can help both parties resolve questions with less confusion.
What are your rights if something is wrong?
Your options depend on the purchase contract, the nature of the issue, and when you raise it. A concern about an agreed repair or included item may call for a different response than ordinary wear. Keep dated photos and written notes, then promptly share them with your real estate representative and lawyer. Your lawyer can explain the remedies available under your agreement.
Disclaimer
"Not intended to solicit buyers or sellers that are under current agency agreement" "Each RE/MAX office is independently owned and operated"


